From the archive
HoloLens Tutorial - Source Control
Last Updated: Apr 18, 2017
Tutorial Accomplishments- Setup a Git Repository
- Initial Checkout
- Create the .gitignore file
- Configure the Unity Project
- Initial Commit and Push
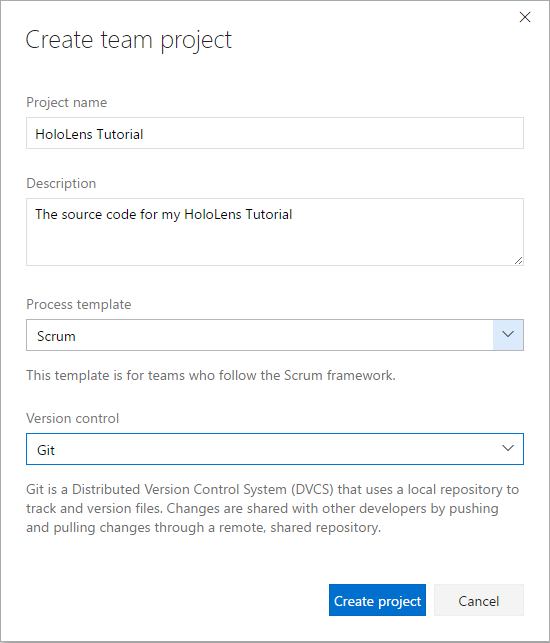 Click Create project, and for the project creation to finish.
Initial Checkout
Click Navigate to project:
Click Create project, and for the project creation to finish.
Initial Checkout
Click Navigate to project:
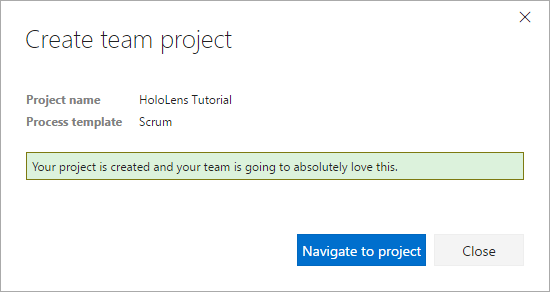 Select Code from the top menu and you will see the project's empty repository.
Open Visual Studio and find Team Explorer. Select Manage Connections and connect to team project. Add the VSO server which is in the form of .visualstudio.com find the check box next to the project you created and enable it. This should look something like this:
Select Code from the top menu and you will see the project's empty repository.
Open Visual Studio and find Team Explorer. Select Manage Connections and connect to team project. Add the VSO server which is in the form of .visualstudio.com find the check box next to the project you created and enable it. This should look something like this:
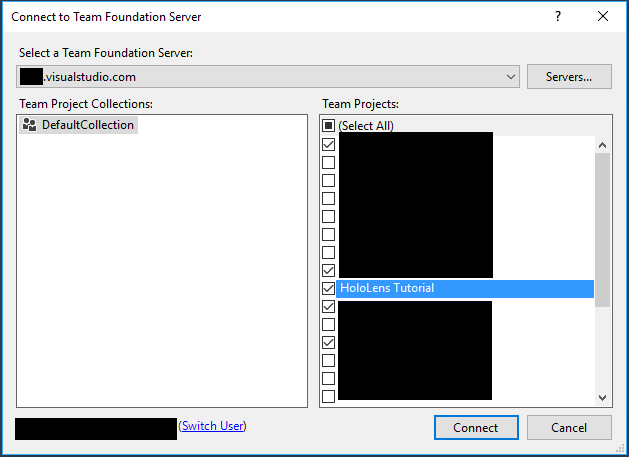 Click Connect which returns you to team explorer. Select Manage Connections again and select the project that you just created and connected to:
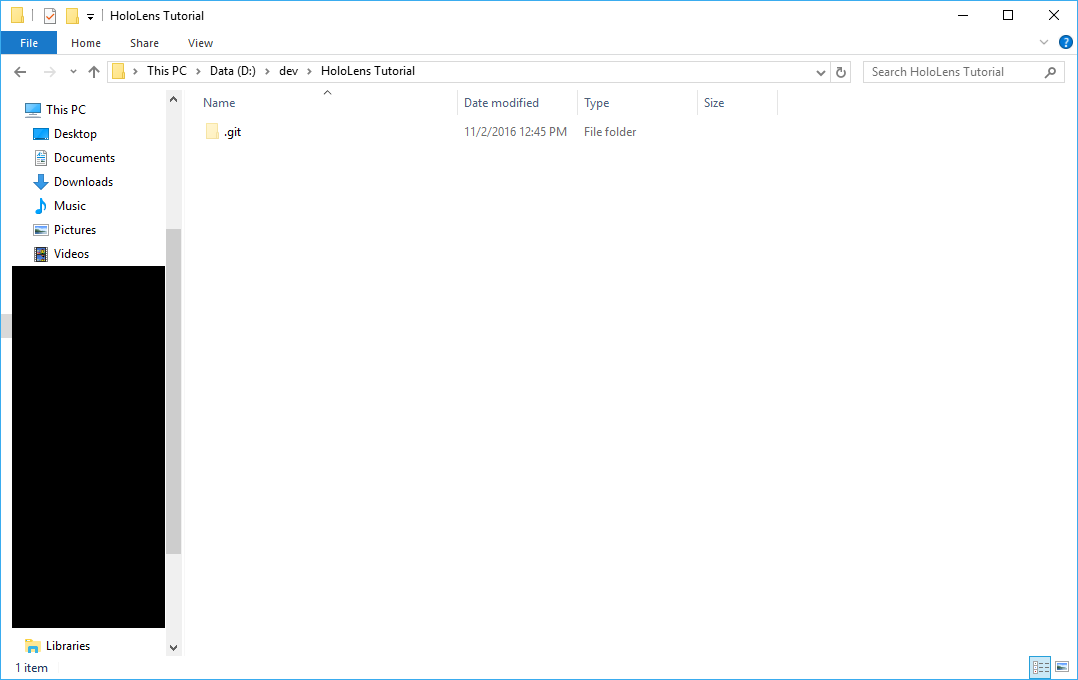
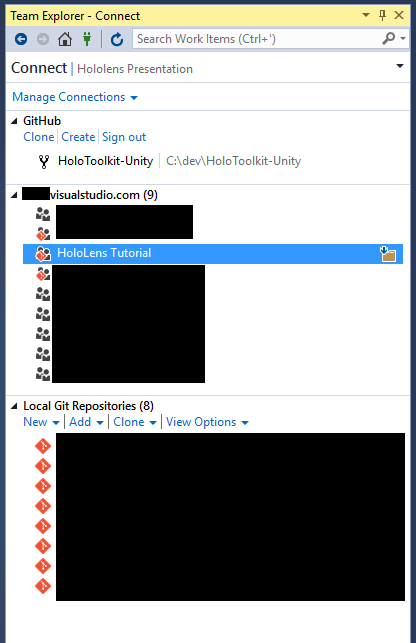 Click Clone this repository and select the folder where you want the code, this should not be the folder where the existing project is located! This results in the creation of a folder with just a .git folder:
 Create the .gitignore File
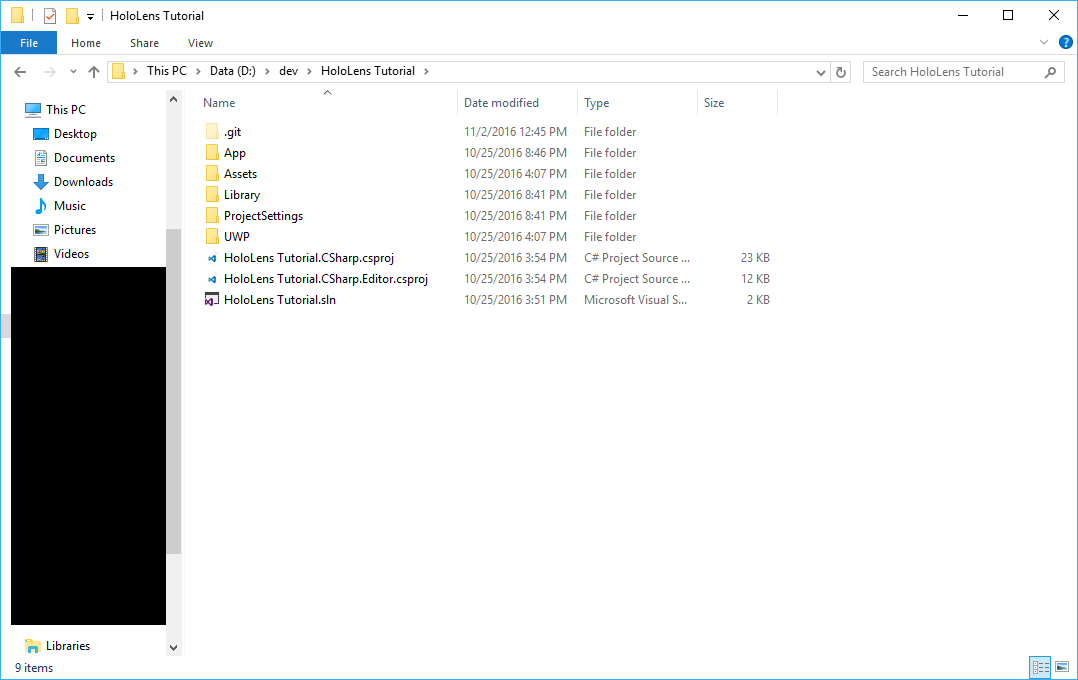
Move the entire contents of your unity project into the folder that was created when the repository was cloned. My folder looked like this:
Create the .gitignore File
Move the entire contents of your unity project into the folder that was created when the repository was cloned. My folder looked like this:
 In Visual Studio Team Explorer you will immediately notice team explorer reacting to the code by showing available solutions to open. For now ignore that and click Changes. Visual Studio/git will detect that a bunch of files are ready to commit:
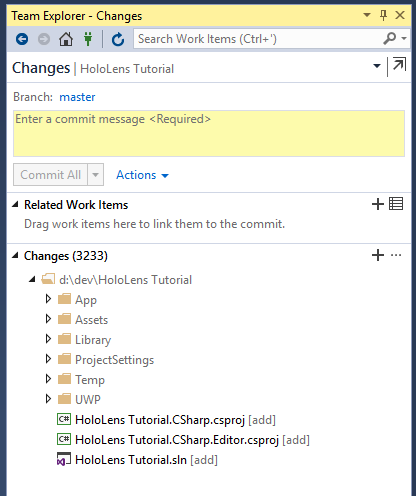 In my case over 3000 for a simple project that does nothing. We don't want to add all of these files to source control because they are files that can be regenerated at any time. What are each of these folders for? The App folder has the built Visual Studio project. Since this was generated we don't want to source control the contents of this folder. The Assets folder contains all the assets of the project this is very important to keep in source control. The Library, Temp, and UWP folders all are generated at build time and should not be in source control. The ProjectSettings folder contains all of the settings configured in Unity 3d and should be in source control. To tell git which files not to place in source control we create a ".gitignore" file. In the root of your project folder create an empty txt file called ".gitignore" and open it in your favorite editor:
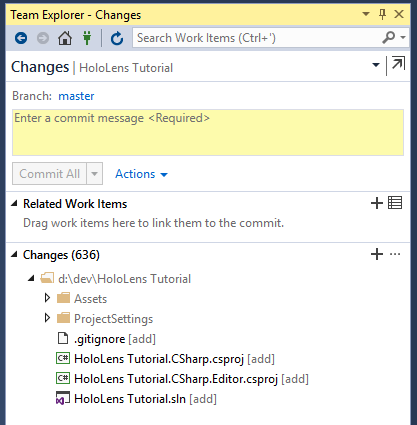
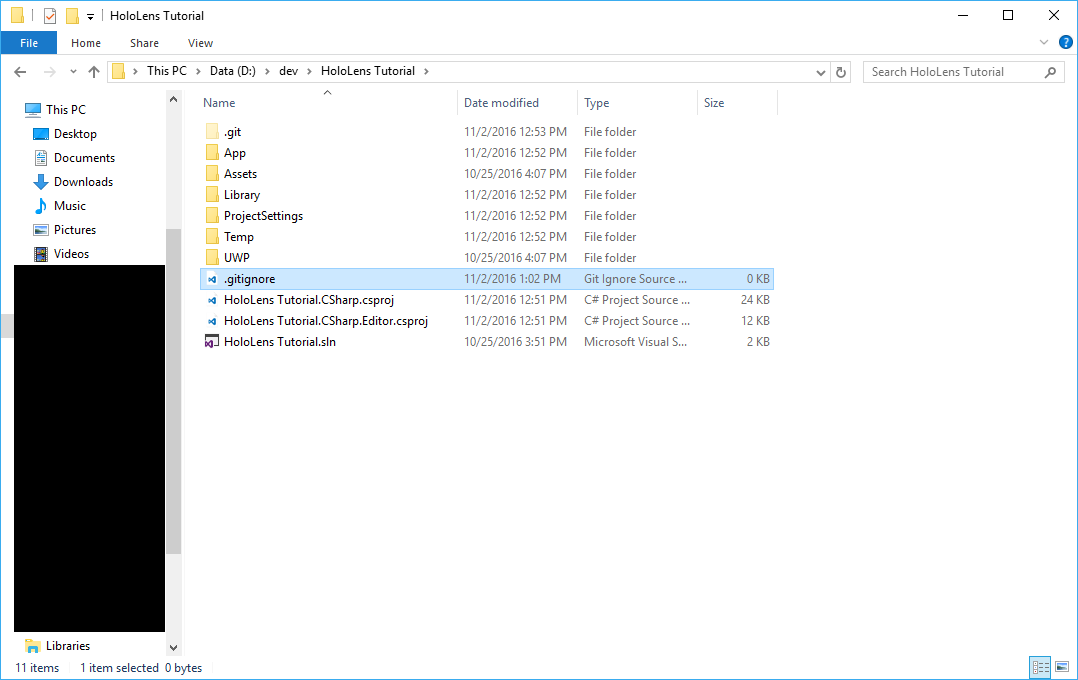 Insert these contents into your .gitignore file. Save your .gitignore file. In Visual Studio the changes ready to commit should change to only the files that we eventually want to check in:
 Configure the Unity Project
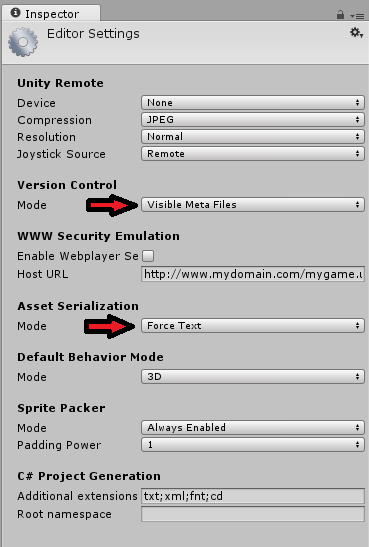
Open the project in Unity. Open Edit -> Project Settings -> Editor. Set Version Control mode to Visible Meta Files and Asset Serialization to Force Text. Your settings should look something like this:
Configure the Unity Project
Open the project in Unity. Open Edit -> Project Settings -> Editor. Set Version Control mode to Visible Meta Files and Asset Serialization to Force Text. Your settings should look something like this:
 These changes are automatically saved. Close Unity 3d.
Initial Commit and Push
In Visual Studio go to Team Explorer and select Changes if you are not already there. Enter a comment:
These changes are automatically saved. Close Unity 3d.
Initial Commit and Push
In Visual Studio go to Team Explorer and select Changes if you are not already there. Enter a comment:
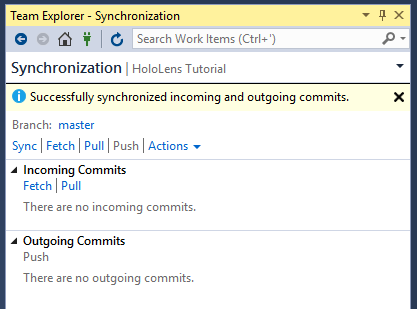
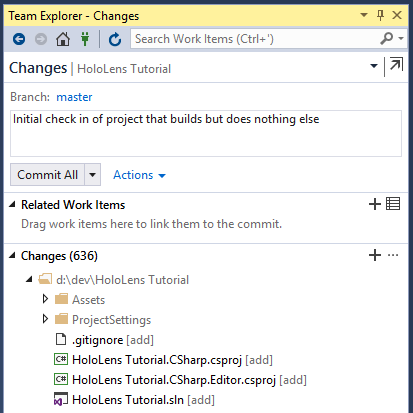 Click Commit All. You have now committed those changes to your local repository. Click sync to go to the synchronization screen of team explorer and sync again to upload that commit to the remote repository.
 At this point the project has working source control. Since this is not a source control tutorial series this will be the last mention of source control. When you would like to check in changes to source control simply commit changes locally and sync them to the remote server.
Tutorial Index
[rps-include post=186]
At this point the project has working source control. Since this is not a source control tutorial series this will be the last mention of source control. When you would like to check in changes to source control simply commit changes locally and sync them to the remote server.
Tutorial Index
[rps-include post=186]Originally published November 2, 2016. Preserved from the legacy CameronVetter.com archive.